Google Analytics is a free tool that provides us with a lot of information about what is happening on our website. Some of the data that we can obtain are, for example, the channel that generates the most traffic, the time users spend on each page, the most visited products, the profile of users, from which region or country they come from, etc. In addition, it allows us to measure which of our campaigns has achieved the highest number of conversions.
Surely you are already excited to discover all this information about your business. But for Google Analytics to give us relevant and quality information, it is necessary that your tracking code is installed correctly and that we carry out a basic minimum configuration.
The best seo services for small businesses has explained how to create and configure Google Analytics step by step and in a basic way, so that you can start obtaining data from your online commerce and apply this valuable information to improve your digital strategy.
GOOGLE ANALYTICS INITIAL SETUP
For Google Analytics to start recording data correctly, we must perform a series of actions and configurations. Among them are:
- Tracking Code: insert the Javascript tracking code on our website to allow Google Analytics to start collecting data.
- Robot exclusion: remove visits from known robots and spiders from Google Analytics traffic.
- IP filter: exclude visits from IPs that we consider necessary, such as home or work, from traffic. This way we avoid clouding the data with our own visits to the web.
- Spam filter: exclude traffic from spam sources from visits.
- Country filter: exclude traffic from certain countries from visits.
- Goal setting: We can set goals, such as a contact request, a user registration or a sale.
Below we will guide you step by step so that you correctly implement each one of them.
1 Tracking Code Insertion (GATC)
It is the first step to follow to install Google Analytics. To do this, we will have to create an account of our company on the page analytics.google.com . We recommend creating the account with a corporate email so that you always have the domain of the property. Later you can invite all the people you deem necessary.
Once the account is created and logged in, we click on the Manage button located in the lower left corner of the screen.

In the Account column, select create an account from the menu.
When creating the account, we must:
1 Indicate if it is a website or application.
2 Put an account name. Try specifying a descriptive name that allows you to easily distinguish it when you consult the list of accounts.
3 In Property Settings, we must indicate the name of the website or application.
4 Indicate the URL of the website.
5 Select a category of the activity sector to which the company belongs.
6 Choose the reporting time zone.
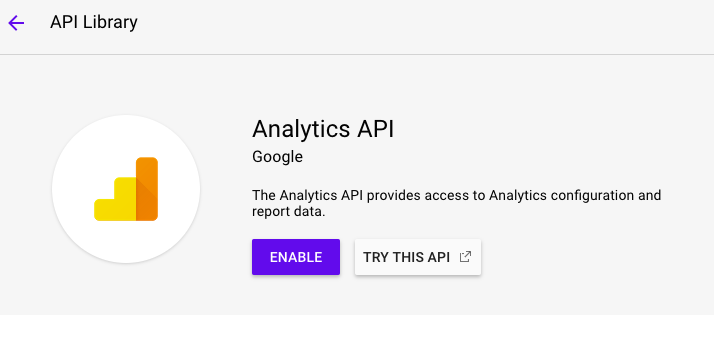
7 Get the tracking ID.
If we already have the account created, to get the tracking ID we just have to click on Manage> Property> Tracking information> Tracking code.
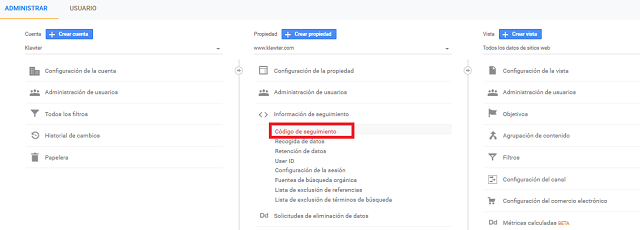
Setting up the Google Analytics tracking code.
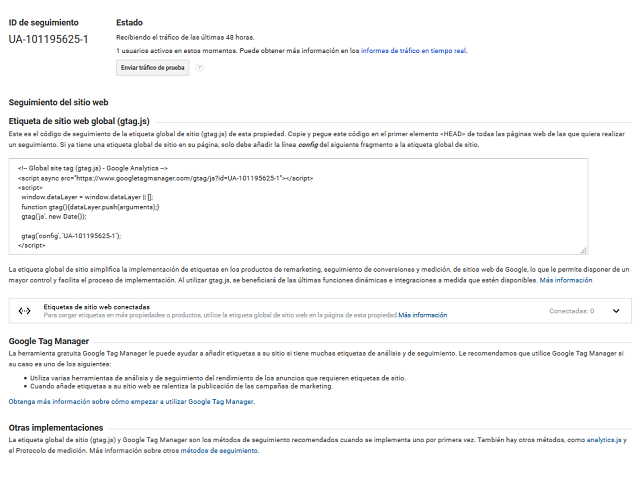
Tracking ID Google Analytics.
Here the tracking code of the global site tag (gtag.js) of the property will appear. This is the code that we should copy and paste into the first <head> element of all the web pages that we want to track.
If you have a web developer who can handle this, send them the code. If instead you are going to enter it personally, in the case of WordPress , you can do it through plugins or manually.
The most popular plugins to insert Google Analytic on a website are:
- Google Analytics MonsterInsights
- Google Analytics by Yoast
- Better Google Analytics
- Google Analyticator
- Google Analytics by BestWebSoft
- NK Google Analytics
- Simple Universal Google Analytics
The problem with these plugins is that they affect the loading times of the web page and take up space on the server. The advantage is that you can manage it yourself without technical help and they are very easy to use.
You can also insert the code on the website itself. It is the most recommended option, since we will not load our website with an external code. To do this, you must access the file header.php where the HTML code of all the pages of the site is included. You only have to paste the Google Analytics code in a line located between the <head> and </head> tags.
If your website uses a template, we recommend that before pasting the code you create a child template, which is a layer that goes over the parent theme. Thus in cases of updating, the tracking code will not be lost, avoiding the loss of data registration or having to reconfigure Google Analytics.
2 Exclusion of unknown robots and spiders
Now that Google Analytics begins to record data, we must clean up the traffic we receive to have the most reliable records possible. To do this, it is necessary to exclude unknown robots and tracking spiders from tracking to obtain only real user data.
To configure it, go to Administration> View> View configuration.
We select the view we are working with and check the Robot filter> Exclude all known robot and spider hits box.
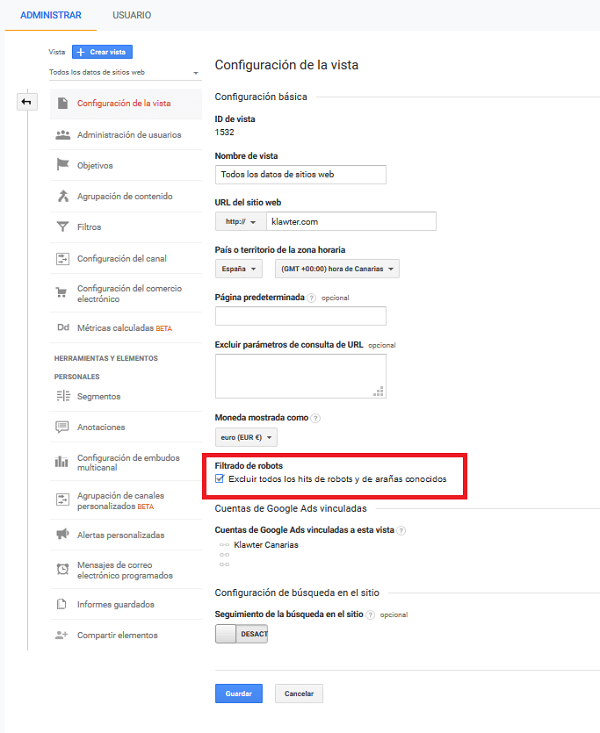
Setting up Google Analytics to exclude unknown robots and spiders.
And since you are in this configuration tab, take the opportunity to check that the domain name, country, time zone and currency that are indicated are correct.
3 IP filter of the work environment
We can also create a filter to exclude visits to the web from our work environment, in order not to dirty the metrics with users who work with the web or belong to the company. To configure it, go to the tab:
Manage> View> Filters> Add Filter.
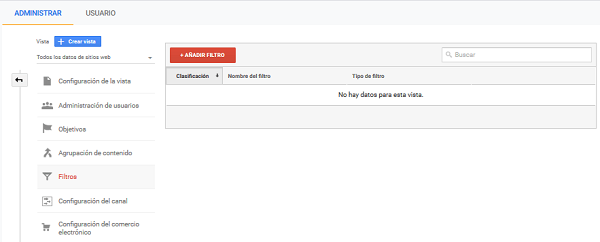
In this tab we assign a name to the filter. In Filter type we mark Predefined and then we select excluding traffic, traffic from IP addresses and we specify the IP address to exclude.
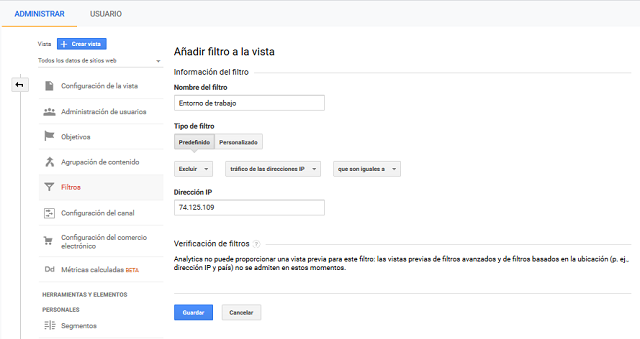
Configuration of Google Analytics to exclude certain IP addresses.
4 Filters to eliminate spam traffic
From the same section where we exclude IP traffic from our work environment, we can eliminate spam traffic that reaches the web. For this we visit Manage> View> Filters> Add Filter.
We indicate a name specifying the use that the filter will have. In Filter type we select Custom, and we indicate Exclude request URL. Below we write the URL that we want not to record data.
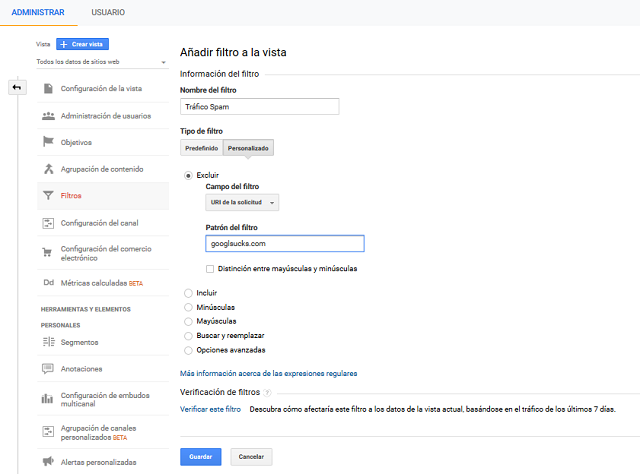
Setting up Google Analytics to eliminate spam traffic.
5 Country traffic filters
We can create filters to exclude visits from countries where our target audience is not located or those that are habitual sources of spam traffic.
All this can be configured from the Filters tab in: Manage> View> Filters> Add Filter.
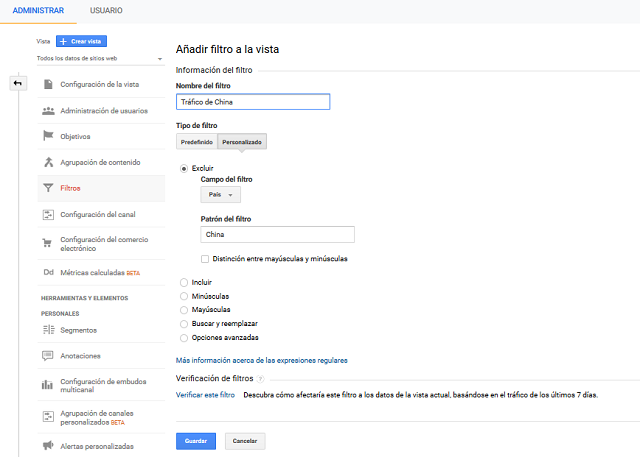
Some of these countries that usually generate spam traffic are: Russia, China, Japan and the United States.
6 Create conversion goals
Conversion goals can be varied. This is the case of a contact request, a purchase, an ebook download, a video that is displayed on the web, a click on a specific button …
Google Analytics allows us to configure all the objectives that we want to achieve with our website.
For this, we must access from Manage> View> Objectives.
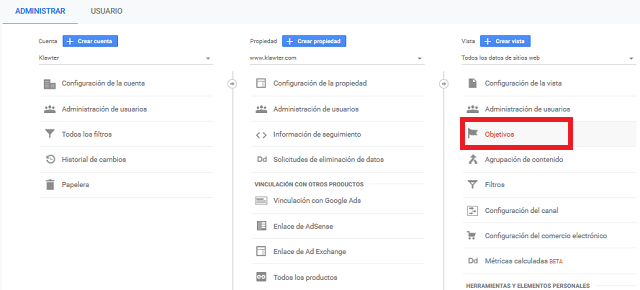
Goal setting in Google Analytics.
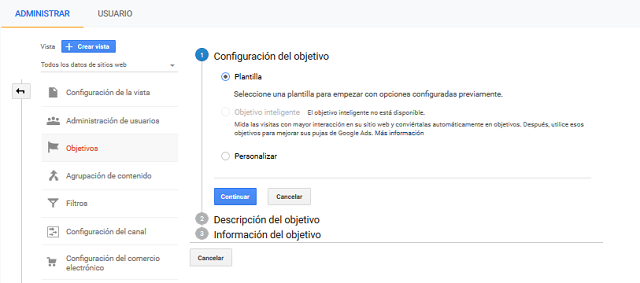
In three simple steps we can configure a goal in Google Analytics:
- We must choose how we want to set up a conversion goal.
- Through the template, with predefined objectives.
- Through personalized objectives.
Next we assign a name to the objective and select what it is we want to measure, having the following options available:
- Destination: to measure the traffic of a certain page. The most common is to track the thank you page (eg: gracias.html) that appears just after completing a purchase process.
- Duration: where the conversion is considered that the user spends a certain time on a URL. For example, more than 2 minutes on the information request landing.
- Pages / screens per session: conversion occurs when the user visits a number of pages on our website. For example, more than three.
- Events: they allow us to follow the interaction of users with our website beyond visits to different pages. For example, users who have watched or paused a video, or those who have registered in our newsletter or downloaded content can measure.
Its configuration is a little more laborious than the previous ones. For this, we must indicate:
- Category: is the name that we provide to group different objects that we want to track. For example Forms.
- Action: Name the type of event or interaction that occurs. For example Submit , which is what happens when filling out a form.
- Label: Provide additional information for events and allow easy identification. This is the case, for example, Product Test Request , which is what that form is used for.
- Value: Assign a numerical value to the event, which can be monetary. In our form example, each captured user has the same value, so we can leave it empty or put 0.
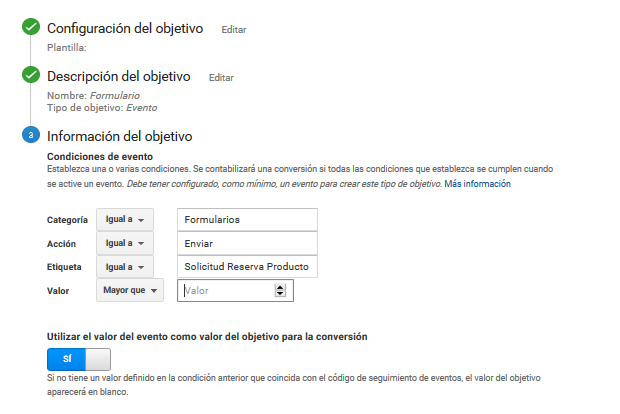
Example of setting up a form in Google Analytics.
We already have the objective configured, but in order to collect the information of the event we must insert the tracking code in the corresponding button, link or element within the web.
The code to indicate on the web would be:
ga (‘send’, ‘event’, ‘ category ‘, ‘ action ‘, ‘ label ‘, value );
Which in our example of the contact form would be:
ga (‘send’, ‘event’, ‘ Forms ‘, ‘ Send ‘, ‘Product Reservation Request’, 0 );
When we hack a landing page we can create a conversion funnel.
If we have a series of clearly defined steps to get to our destination URL, we can define a conversion funnel. With this funnel, Google Analytics measures where we can have a bottleneck that prevents conversion. A classic example of a conversion funnel would be the various steps of a shopping cart.
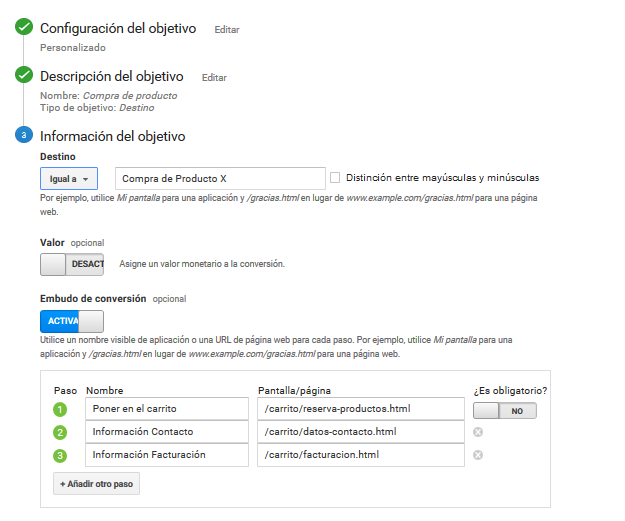
Example of setting up a conversion funnel in Google Analytics.
Conclusions
If we configure Google Analytics correctly, we can begin to record data on our website and take measures that help us improve the performance of our business.
Keep in mind that once the tracking code is configured, it takes between 12 and 24 hours for the filters and conversion objectives to be effective and to start posting data. It is necessary to always verify that the implementations have been carried out correctly.